
Pandoro has been one of those Christmas breads I've always wanted to do, but had not tried for several reasons, one did not have the mold. I found just what I set out to make my first pandoro. This bread is a new challenge, something I've never developed and that involves some difficulty. So I put all my love ..
several recipes I looked, and finally chose to start of Maggie Glezer. A bakery book that I have had a lot in my library, and I browsing occurred a few days ago. Surprise, the desired recipe and very well explained, the recipe for a famous bakery in New York, Bruno Bakery.
As is known, this traditional Italian bread is all a test of patience because it requires long waits and various mixtures to achieve the perfect body, but yes, we realize that all the work worthwhile to see our bright mass elastic as silk, see the mold full of the voluptuous and sweet-smelling dough, and then to the beauty out of the oven, golden high .... Well, that's just the beginning, then when we cut the first piece and see the wonderful and perfect crumb, we say that we have to repeat it .... The great sense of achievement does not end there, it continues when we feel like melts in our mouth so delicious ... lol, you may be exaggerating some might say, but not really every bite is a delicacy and delicacy of kings, no doubt.

The characteristics of this recipe we first use of sourdough, the original recipe using sourdough sourdough , I used my wheat sourdough that always gives excellent results, in my opinion any sourdough wheat with 80% water will work. Second, it takes a minimum amount of cocoa butter As there are only 10 grams. can be replaced with melted white chocolate, and I have read that you can simply substitute for butter. I used white chocolate. Third, the butter should fight with the electric mixer with cocoa butter for several minutes before being incorporated into the dough.
is a wonderful recipe, the result is magnificent. I hope it will encourage. Just to be prepared to invest approximately 33 to 36 hours in the preparation of this bread, including preparation, mixing and waiting times.
The book recommends cooling the dough to start at 9 am, so you can bake your bread a day after about 6 or 7 AM. I did well and everything was fine.
The first part of the recipe can be done by hand and then at the end in the mixer or blender.
Happy Sunday and wonderful week for everyone.
Additional note: We recommend using higher flour protein content approx. 14% osmotolerante instant dry yeast, the high sugar content of this bread. You can also use fresh yeast, in this case between 1.5 and 4 g.
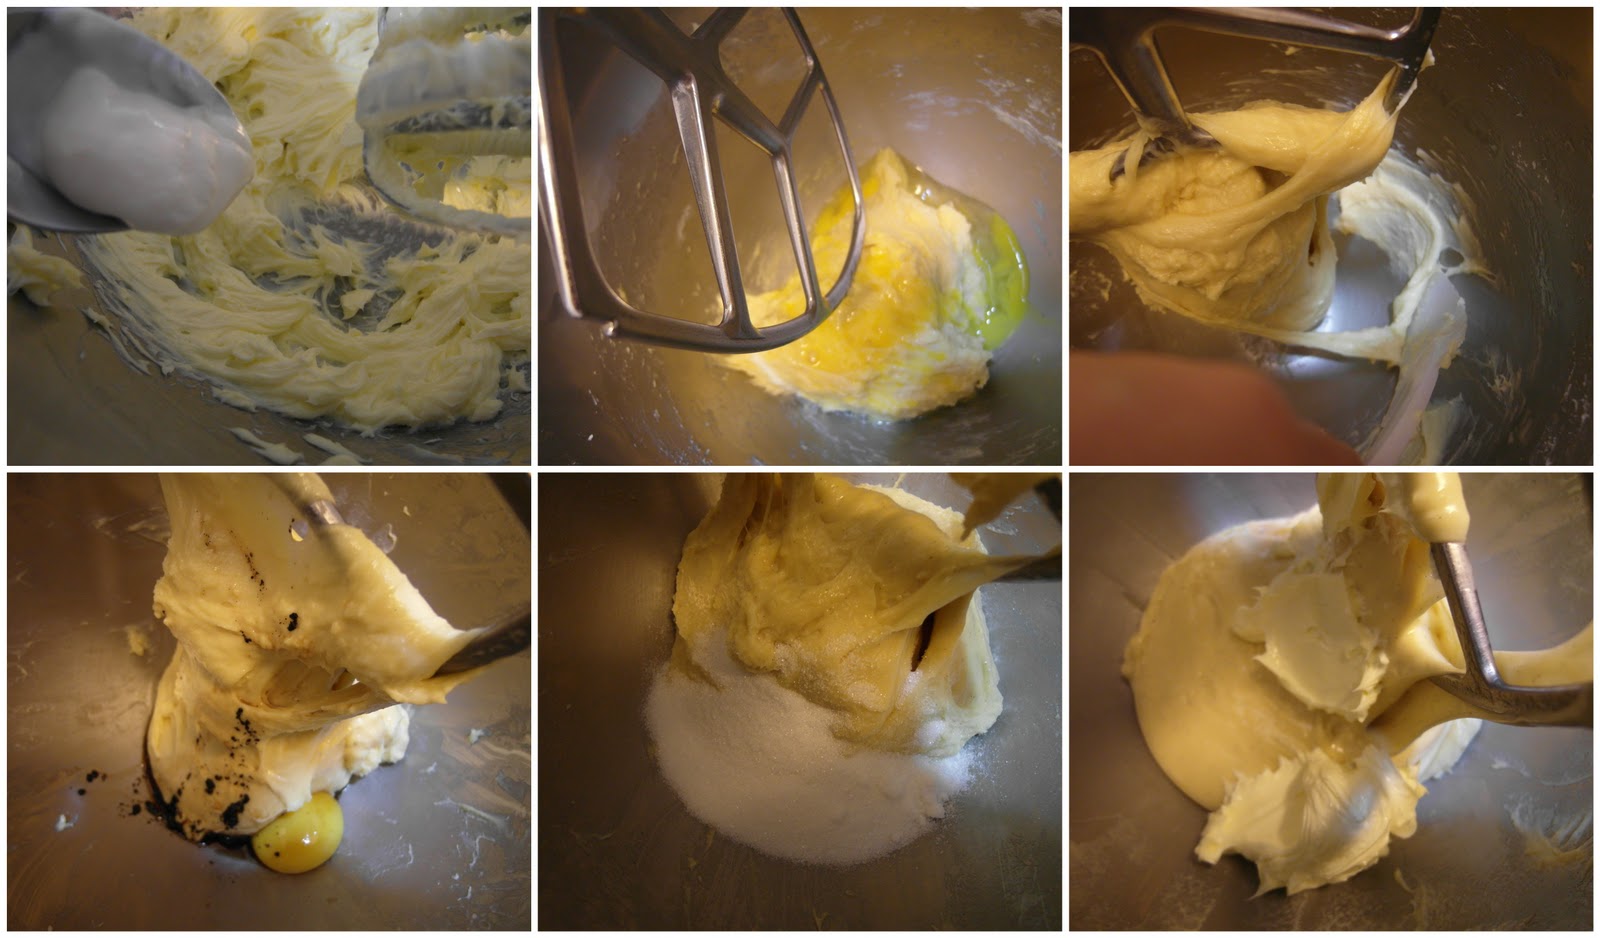
PS The photos are to give an idea of \u200b\u200bthe procedure, not necessarily all the steps they would be plenty of photos: D
Ingredients and development:
(for two pandoro approx. 500 grs. c / u)
ideal fermentation temperature between 24 and 26 degrees C, if it gets colder, you have to wait a little longer in each fermentation . Mass
mother

60 grs. wheat sourdough cooled 8 to 12 hours before (mine is 80% hydration)
30 grams.
warm water 65 oz. bread flour (recommended use flour high in protein)
sourdough is dissolved in water and add the flour, is formed mass, is given a ball, cover and let stand approx. 4 hours. When ready, continue with the first Impasto or FIRST MASS.
PRIMO Impasto (FIRST MASS)
½ teaspoon instant dry yeast osmotolerante (If the temperature is over 26 C using 1 / 4 teaspoon) 1 tablespoon
water 105 grs.
refreshed sourdough
115 grs.
bread flour 1 egg 30 grams
.
sugar
1.Mezclar yeast with water and let stand 5 minutes.
2.The a bowl, place the 105 grs. of dough into pieces, add the flour, baking powder diluted, egg, knead by hand. Mass is a little harsh. Then add the sugar and knead until sugar is dissolved and the dough is soft.
3.Place in a greased container, cover and let rise for 3 to 4 hours until it has tripled in size. After this time we continue the Impasto or SECOND SECOND MASS.
Impasto SECOND (SECOND MASA)


10 grs. cocoa butter (I used white chocolate)
200 grs. butter at room temperature (plus a little extra to coat the molds)
225 grs.
bread flour 5 gm.
salt
All Impasto OR FIRST MASS PRIMO
10 grs. 4 eggs, honey
15 grs. vanilla extract (I used 10 grs. to extract and half the contents of natural vanilla bean)
2 egg yolks 135 grams
. sugar
already fermented FIRST impasto.
1.Derretir cocoa butter or white chocolate in microwave or double boiler.
2.Batir butter until very creamy and add the white chocolate or cocoa butter, once well beaten and mixed, set aside.
3.Preparar molds, buttering and flouring well. In my case, my pan is nonstick, so do not put anything.
4.In the bowl of the mixer, stir together flour, salt, and mix. Add the chopped Impasto PRIMO, honey and three eggs. With the hook, mix everything very well until dough separates from the walls of the bowl.
5.Detener the mixer, and replace the butterfly hook or paddle (which is generally used for cakes).
6.Agregar the other egg and beat on medium speed until incorporated well. (From here you must stop the machine every time you notice that the dough sticks to the walls, and clean the walls with a spatula, and the mass will take shape faster, do not despair at the end you get a batter with a very smooth appearance (a little liquid) but very bright, supple and velvety texture)
7.Agregar vanilla and egg yolk. Continue mixing on low speed first and then on medium speed until incorporated all very well and the dough looks smooth again. These steps require patience. Give her time to the mass and see how it takes shape.
8.Agregar another egg yolk. Repeat the same operation, stop the machine, scrape sides of bowl and continue kneading until dough is smooth.
9.When the dough is smooth and completely absorbed the whole egg, add half the sugar. Again wait until incorporated well.
10. Moreover we add sugar and beat until well blended and sugar fully incorporated into the dough.
11.A once the dough is smooth, add half the butter (which have fought alongside white chocolate or cocoa butter), beat until incorporated into the dough, which increasingly looks smoother ( looks runny), but is turning smooth and bright, very elastic.
12.Finalmente the other side of the butter ... wait until it is fully integrated ... the dough should be very bright and have a silky texture.
13.Vertimos the dough on a well floured board and using the large spatula, divided into two equal parts, approximately 500 grams. each. We are using the spatula and floured hands, roll the dough and folding it over itself, and then form a ball (not easy to give a ball, but we do what we can), we raise with the spatula large and placed in the molds. The movement should be fast and safe, since the dough is very soft.
14.Dejar stand covered (leaving space on top for once levada the dough should extend slightly beyond the mold) or inside a large bag 12 hours approx. or until the dough is rounded on the edge see mold, you must fill it completely.

15.Transcurridas 12 hours approx. or more if necessary, uncover the dough to dry the surface a bit and in the meantime preheat the oven to 180 C.
16. Bake for 30 to 35 minutes. (I've baked at 180 C for 10 minutes, then reduce heat to 175 C over the next 25 minutes, taking care not too browned on top, as conventional ovens in our kitchens too hot up and have to brown the bread too. Sometimes what I do is once observed that it has browned on top, turn off for a few minutes the top of the oven, and then turn on intermittently, but be very aware. If you have the option on your oven temperature control than would be ideal. It's just a helpful tip for any bread high, even the type cast).
17.Sacar the oven and let cool in pan for 30 minutes, unmold onto a rack. A Once completely cooled, sprinkle with plenty of icing sugar. My children were in charge of powdered sugar and how they had fun with the "snow" and the Christmas tree in one of the photos was the idea of \u200b\u200bthem ^ _ ^


can last well wrapped for at least a month. Although it is something that I doubt I can check for these at home will not last even two days: D
This entry will Yeastspotting.


